
If you would consider yourself to be somewhat of a “crafty” person, then this relatively easy and cheap hack at making your own rope rainbow hanging will be right down your alley!
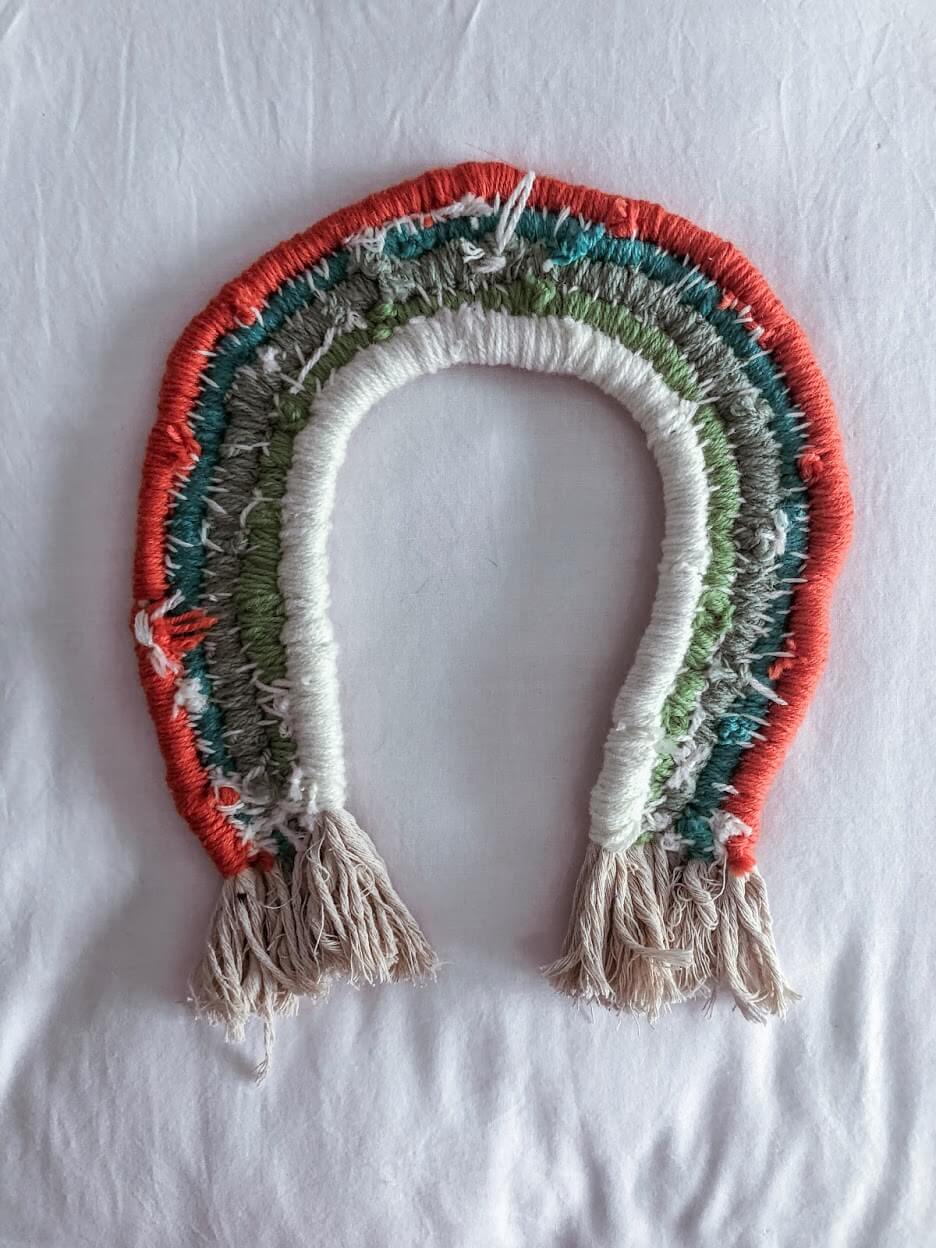
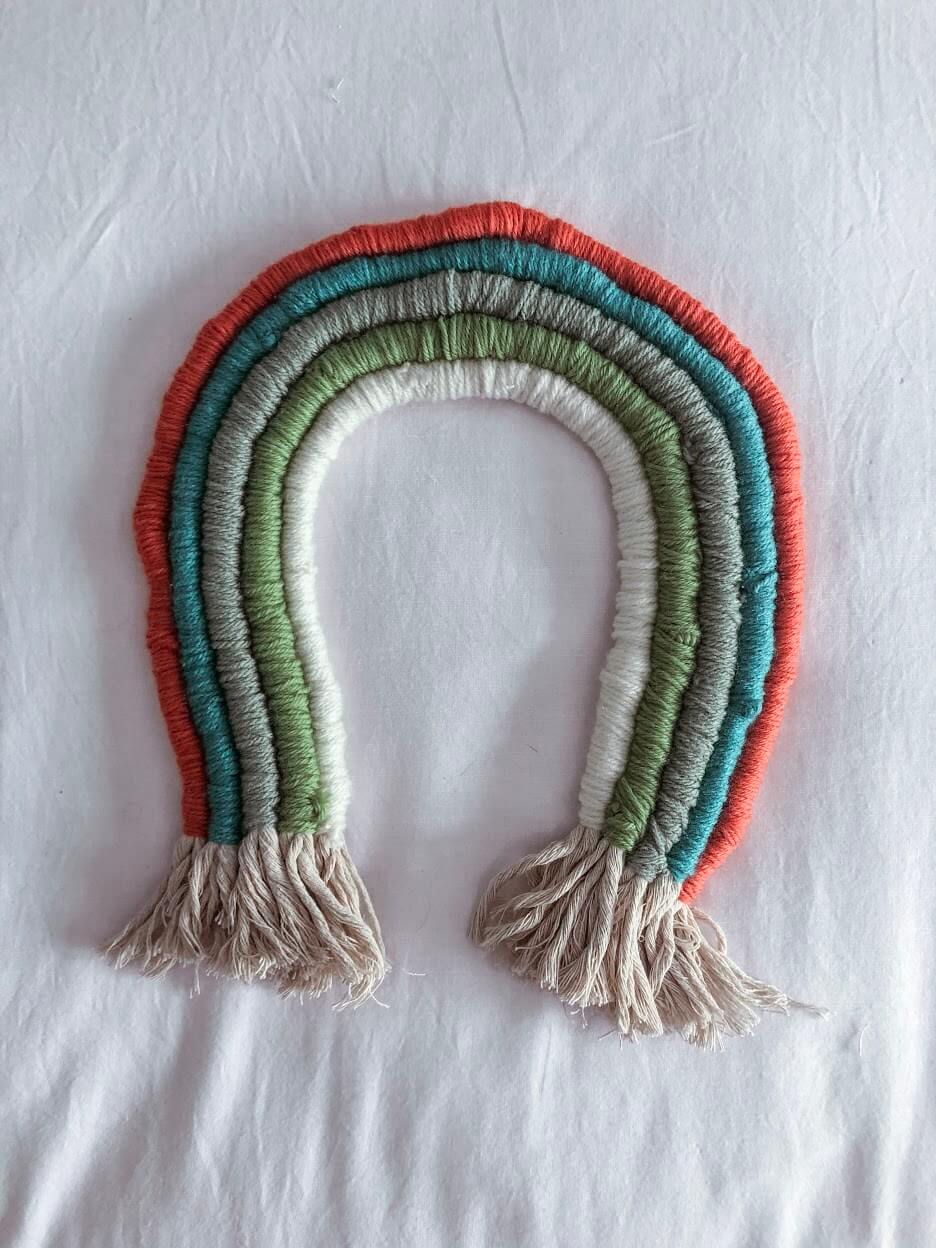
After deciding that I apparently don’t already have enough on my plate as it is, I decided to try my hand at making a rainbow rope wall hanging to put in Noah’s new playroom. Not for the fact that I wasn’t prepared to go out and buy an already made one, but because I enjoy getting into the “arty crafty” things and after doing a bit of research online, I found that it wasn’t going to be that hard to try and make. Now of course I want to point out that I am in no way a professional at this! This is the first time I have ever made one of these rainbow hangings so my stitching isn’t on point and there were a lot of things I could obviously improve on, BUT if you are prepared to give it a shot and try and make one yourself (and for a fraction of what you could possibly be buying one for) then take a look at this helpful step by step guide. I’ve included a photo guide of what items I used to make the rainbow hanging, although you can change some of the items up if needed for eg- If you would like to use premium wool for your rainbows then you most definitely can
What you will need
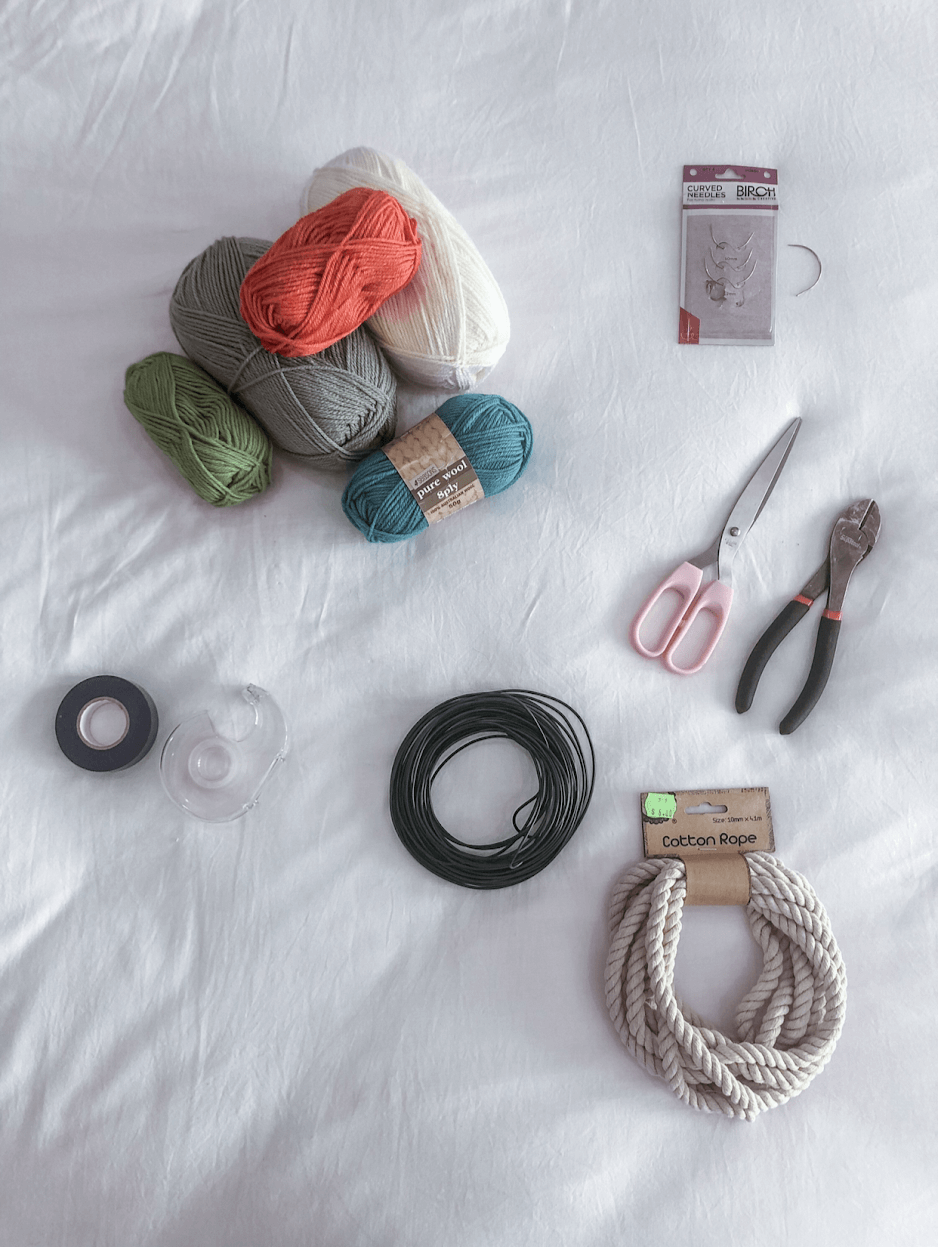
–Curved needle – You can pick up a four pack from Spotlight for $3.75 (or any home depot department/ Kmart/ sewing shop)
–Coloured wool/Yarn – I chose the cheapest wool at Spotlight (approx $3 each ball of yarn) as I wasn’t sure if the rainbow hanging would even work and I didn’t want to be wasting a lot of money in that case if it didn’t. Obviously now that I know how to make one, I would be more than happy to go ahead and purchase more expensive or patterned wool if that is what I wanted to use for next time. Thick wool will take you a lot less time to wrap around your rope and you can also choose patterned wool or decorative wool, whatever takes your fancy to be honest and whatever colour pattern you are wanting to go with
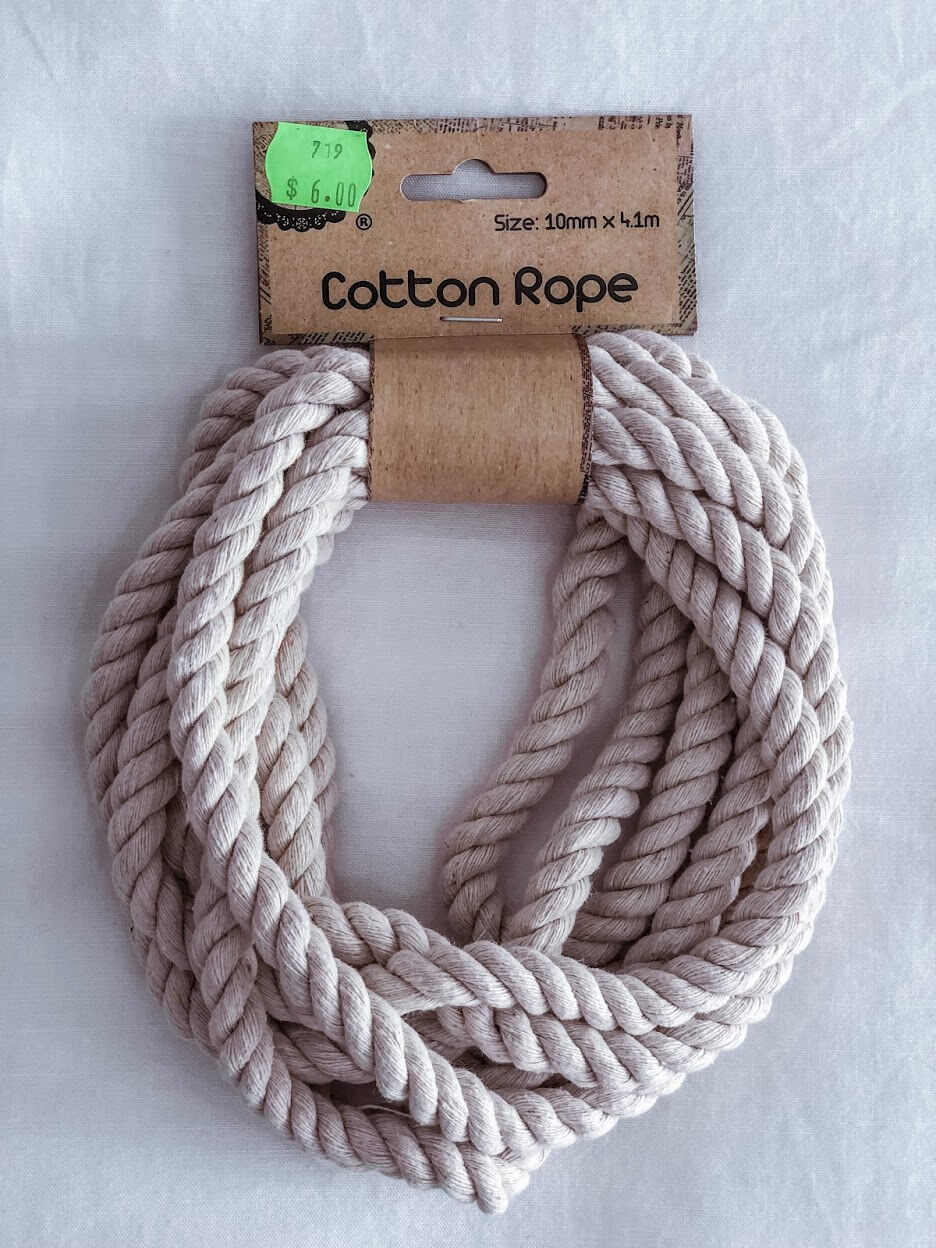
-Rope – ($6.00) The length of your rope will be entirely your preference as it determines how big you want your rainbow hanging to be. The rope I bought was from a discount store and again, I would suggest going to a home depot store and buying rope that is thicker. Don’t get me wrong the rope I used still worked, however it was very flimsy and I found it hard to wrap my wool around it. You also don’t want anything too thick that you cant bend very well, but thick enough to still hold its shape. Perhaps you could also trying a boating/camping store
–Masking tape/electrical tape – This tape will be used for the ends of your rope to stop the rainbow from fraying. I used thick electrical tape as we already have this at home, however any type of thick masking tape would do the same job. I wouldn’t suggest clear plastic tape for the ends as it is quite flimsy
-Wire – ($4.00) Wire is what you are going to need to tape securely onto each individual section of rope that will be wrapped in wool. It needs to be thick enough to keep the rope sturdy (so it wont be flimsy when you wrap the wool around) but also thin enough that you can bend it in shape. Again I bought some cheap wire from a discount store which didn’t really do the job very well. It wasn’t thick enough and didn’t hold it shape very well which made my rope bend too much when I was trying to wrap the wool around. I would suggest you go to your local home improvement store or home depot store (Bunnings/Mitre 10/Spotlight etc) and test the wire before you buy
-Clear sticky/invisible tape – You will need this so you can tape down your wire onto your individual rope pieces. Just your average clear sticky tape will do
-Pliers ( To cut your wire )
–Scissors
How to make the rainbow
Note- This is not the rainbow I originally made, these pictures are just purely to show how to make it step by step. I’ve tried to make it as easy as possible to follow along. If you need any help or have any questions please feel free to ask!
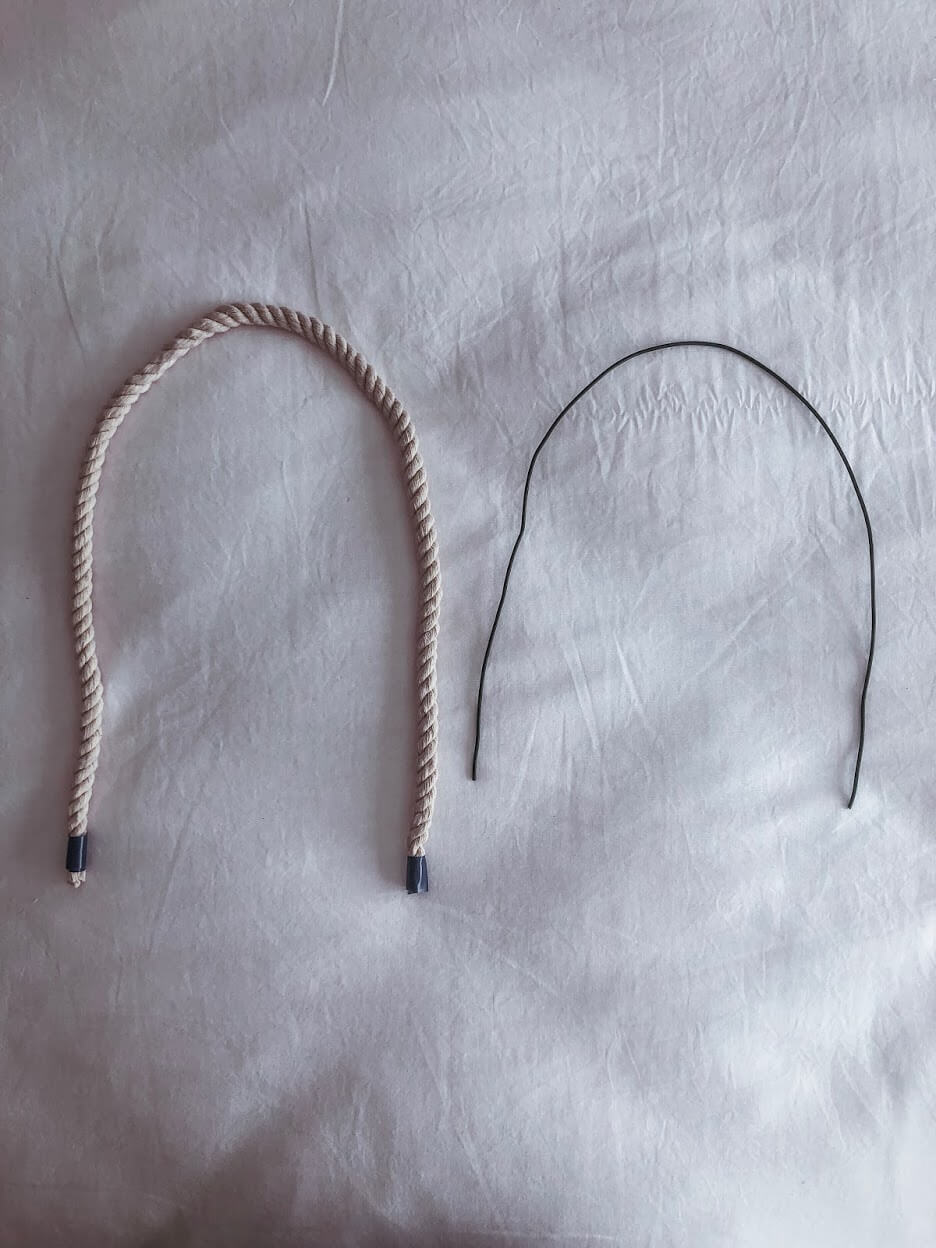
1. Firstly you will need to lay your rope out in the shape of your rainbow. The size of your rainbow and the amount of colours you have in your rainbow will be determined by how long your rope is and how you lay it out. Once you have your rope laid out in your desired shape, make a cut through the curved ends of the rope

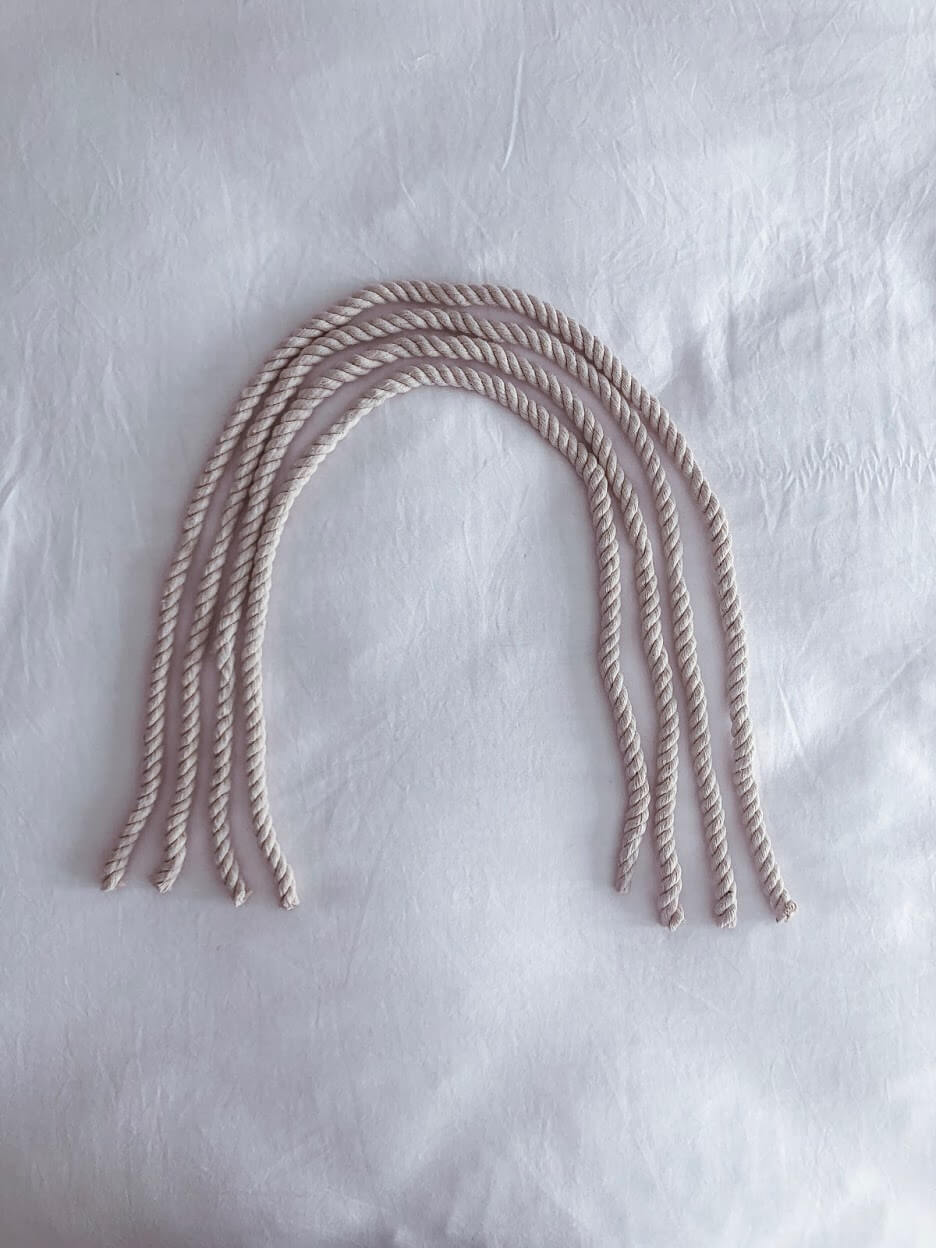
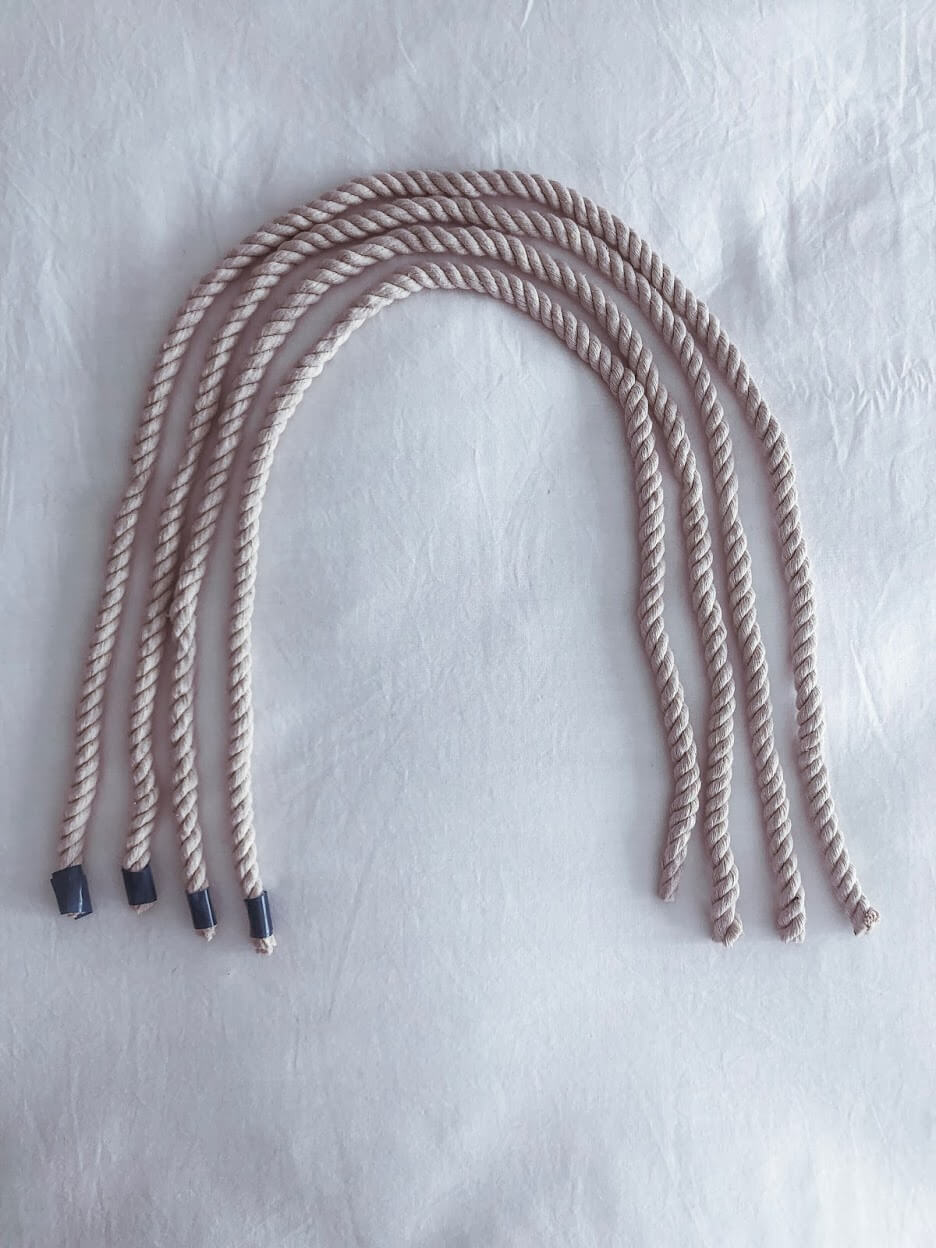
2. This is where you will need your masking tape/electrical tape. Take a small piece and wrap it around each end of the ends of the separate pieces of rope. This is to stop the rope from fraying
3. Next you will need to cut a piece of wire and bend it into the shape of your rainbow. The length of the wire will depend on if you want your rainbow to have a frayed end or if you would like your wool/yarn to cover the whole length of the rope. If you want your rainbow to have a frayed end then you will need to cut the piece of wire a tad shorter than where you want the wool finish. If you want your wool to cover the whole length of the rope then I would suggest you cut the wire so it covers almost the entire length of each individual piece
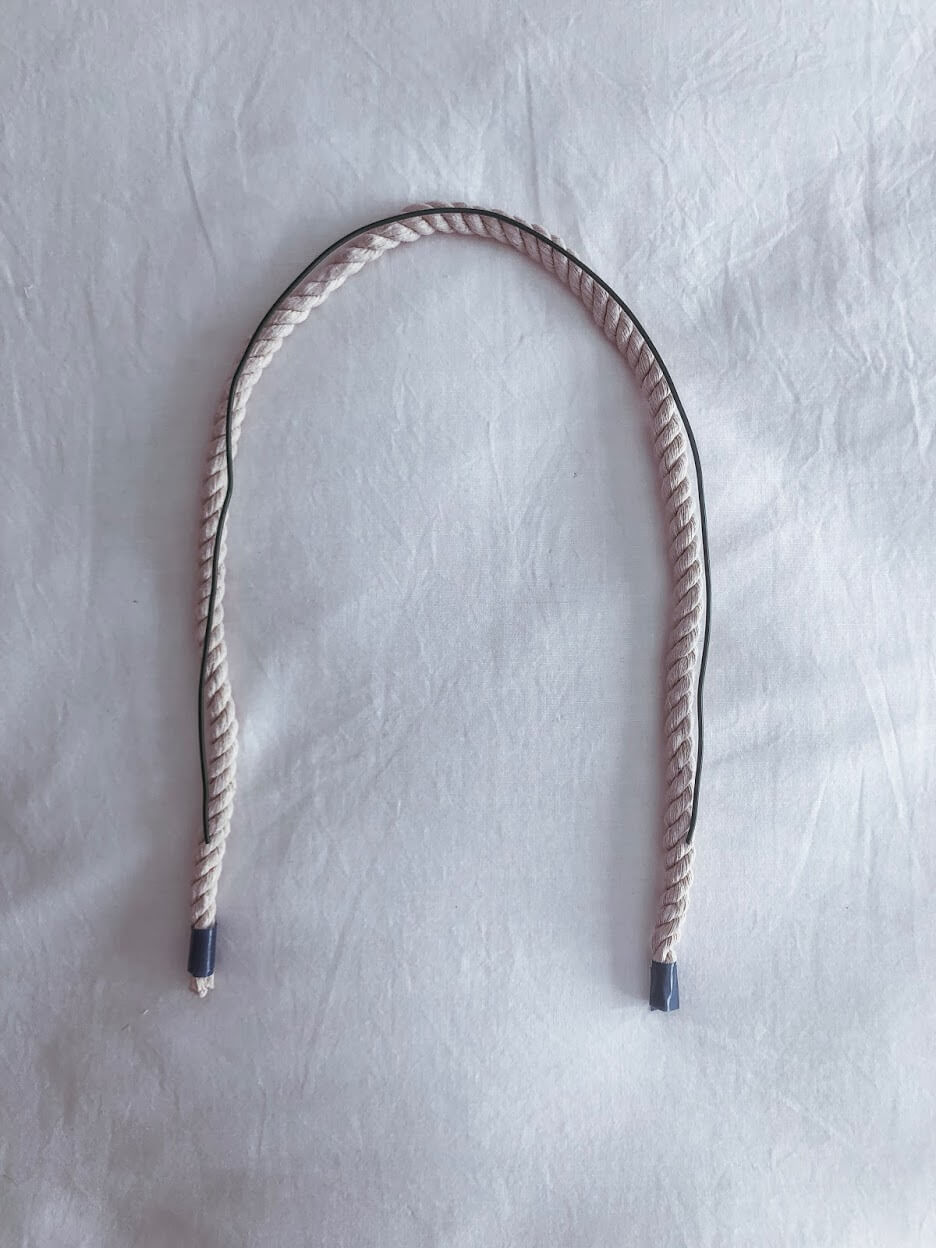
4. You will need to secure the wire onto your rope next. You will do this with the clear sticky tape. Place a few pieces in the middle of the wire and one at each end of where the wire begins. Feel free to add more on if you feel necessary, however don’t make the tape too thick as it can make your wool look uneven once its wrapped onto the rope
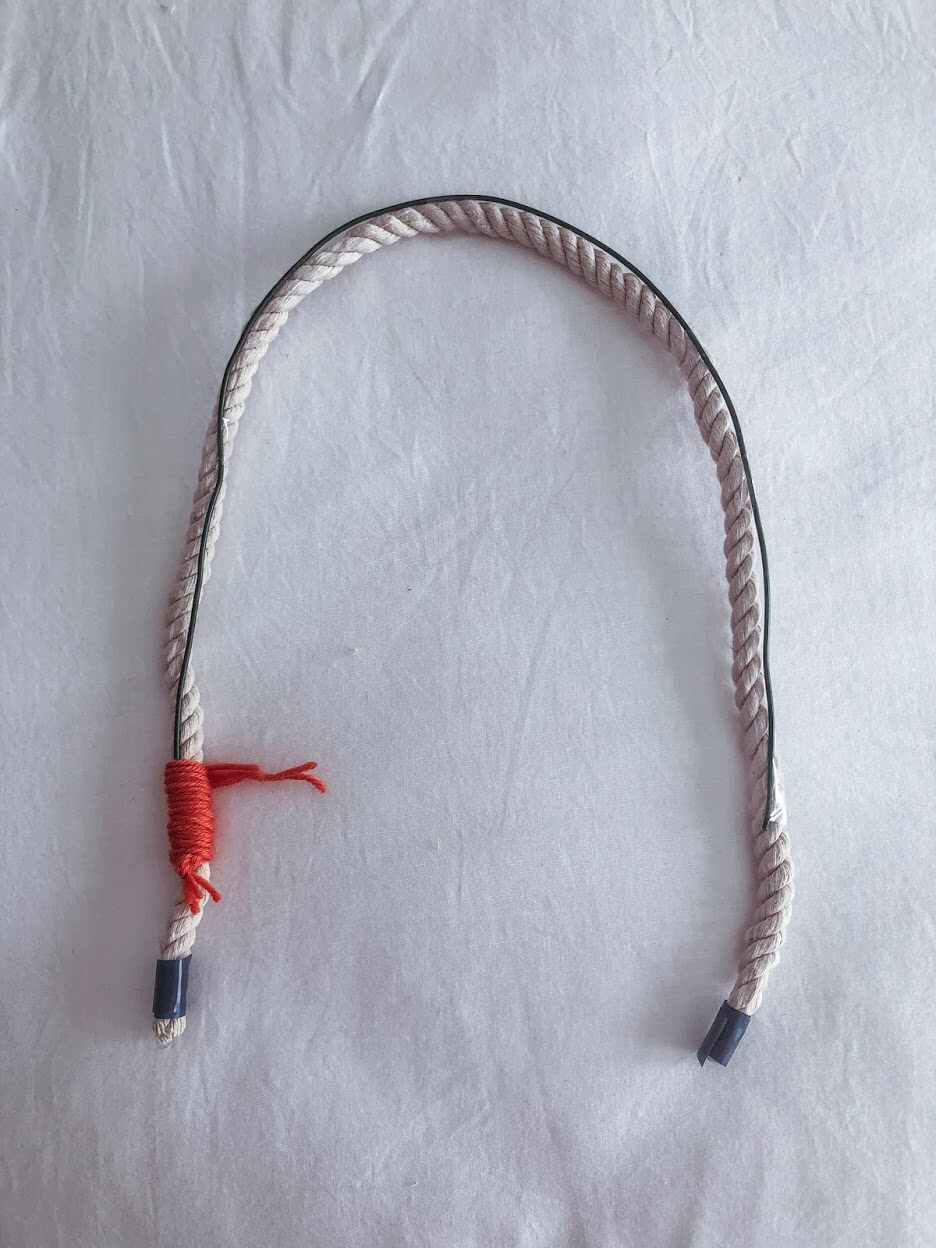
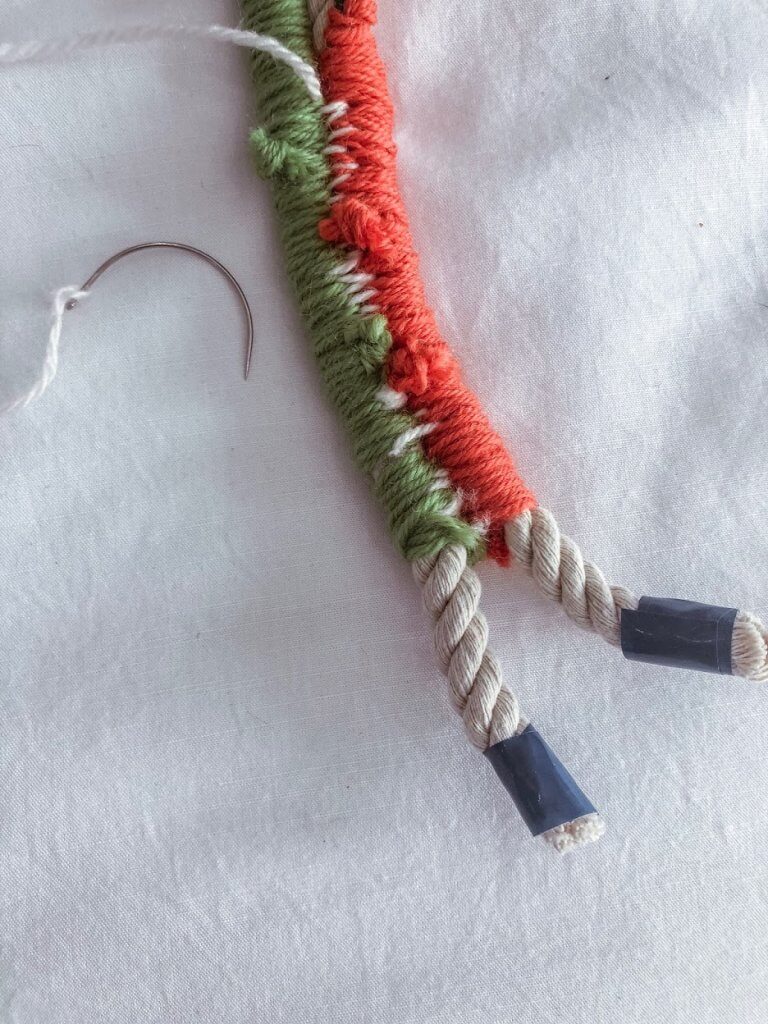
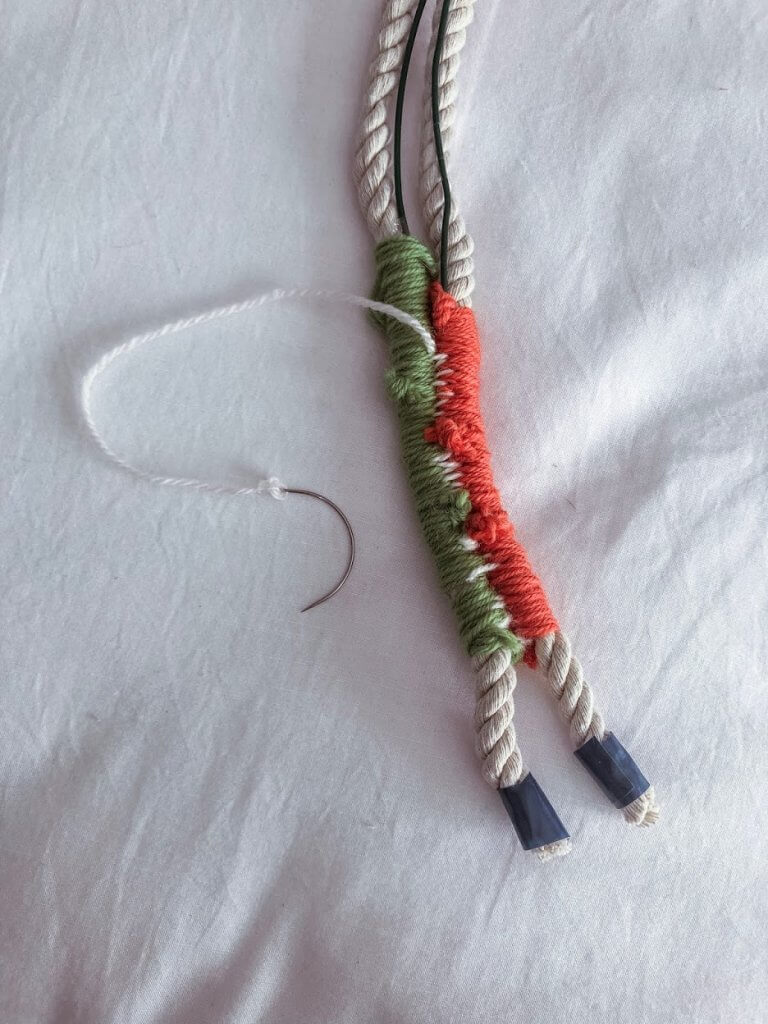
5. Now to start wrapping your wool around the rope! As you can see in the picture you either start your wool midway up the rope OR you start wrapping your wool right from the bottom. Entirely your choice. Either way, obviously make sure you are covering the wire that is attached to the rope. I also started wrapping my wool from the inside piece of rope in the rainbow and worked my way outwards. Now because the wool I used was quite thin, I would suggest if this is the case with the wool you use that you double up or even use a layer of 4 pieces to wrap around your rope. It will save you lots of time by doing it this way. If your wool is thicker you may not need to do this however. Try and keep the wool the same width/height while wrapping it around the rope, this way you wont have sections that look uneven as well. I would also suggest keeping all your knots towards the back of the rainbow. I made the mistake of not doing this and ended up with a lot of knots placed randomly around the sections of rope which was then hard for me to try and hide at the end
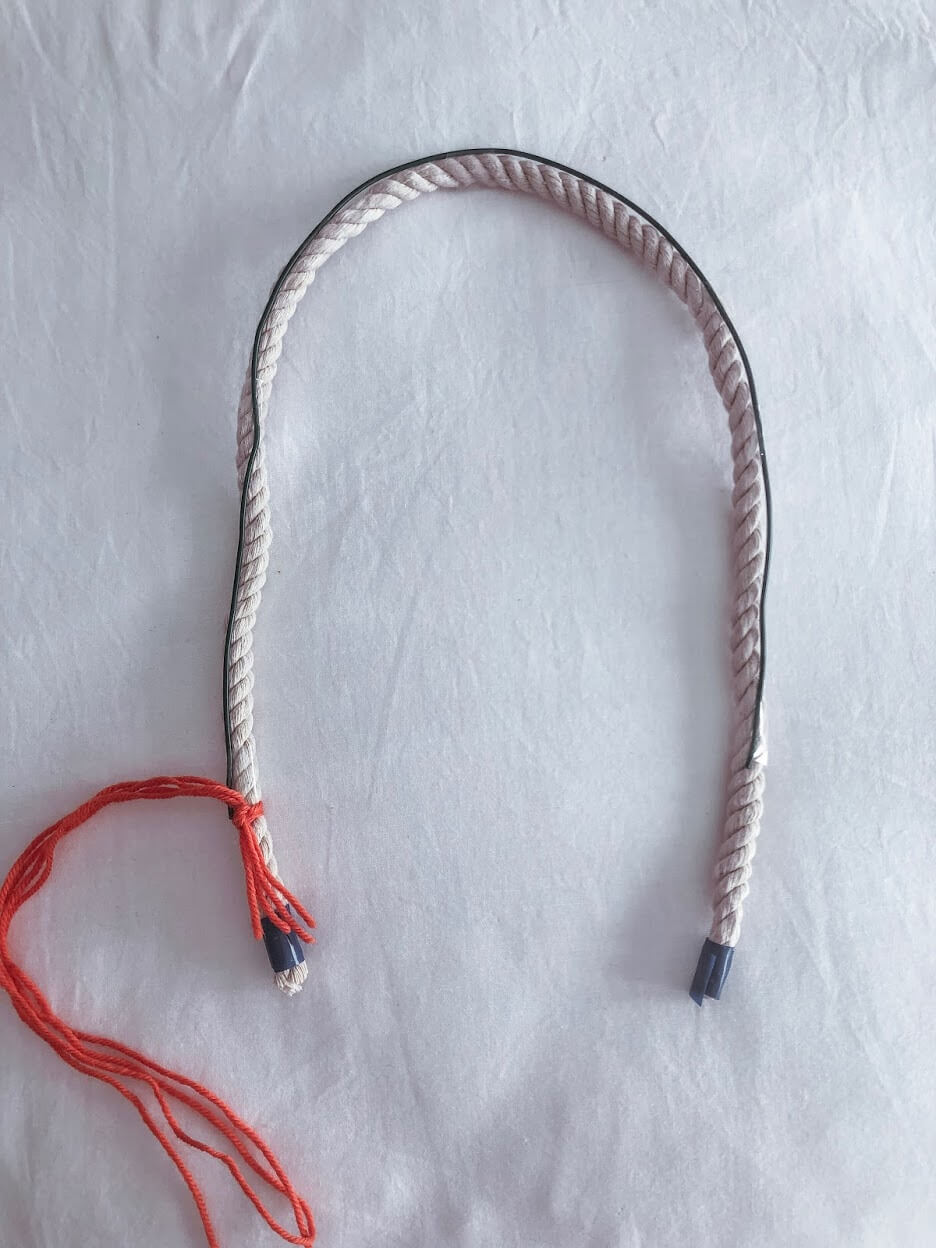

6. I would also suggest that when you are wrapping the wool around your rope that you try and keep each individual piece of rope the same ( start the wrapping of the coloured wool always in the same spot ) as this will make sure it is all even once you go to attach the rope together at the end. If you find some sections of your wool are uneven you can always unpick some of the wool if need be to line it all back up
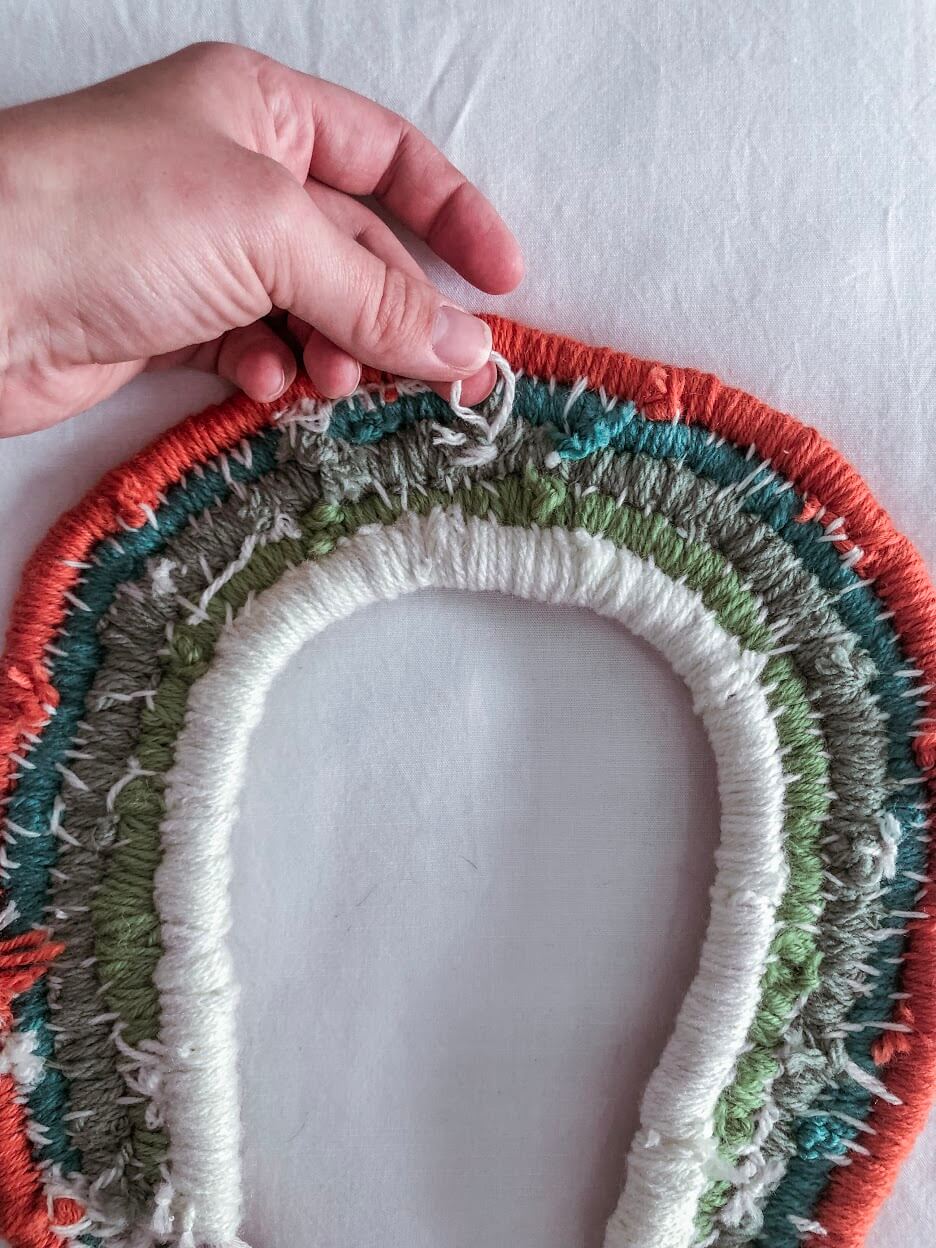
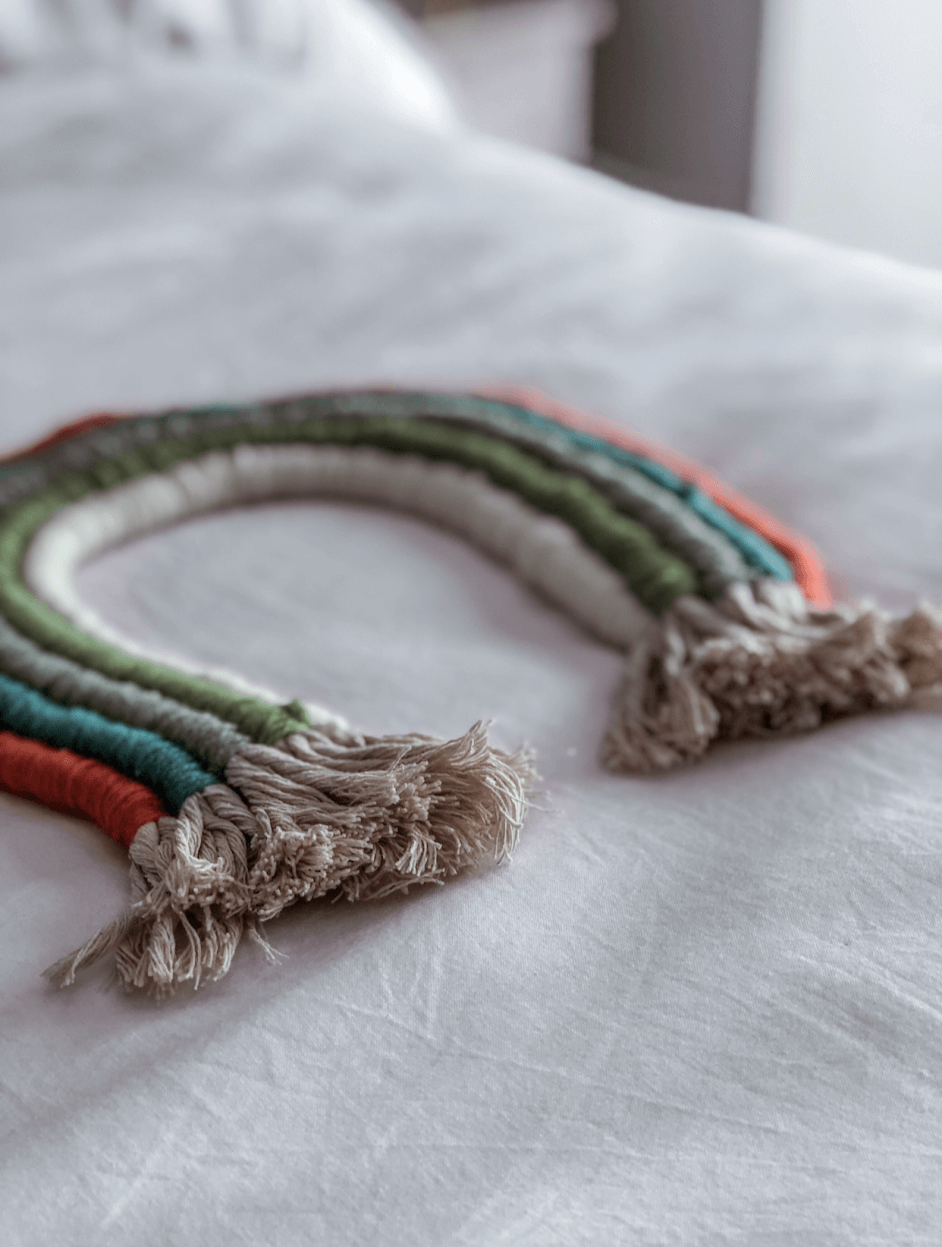
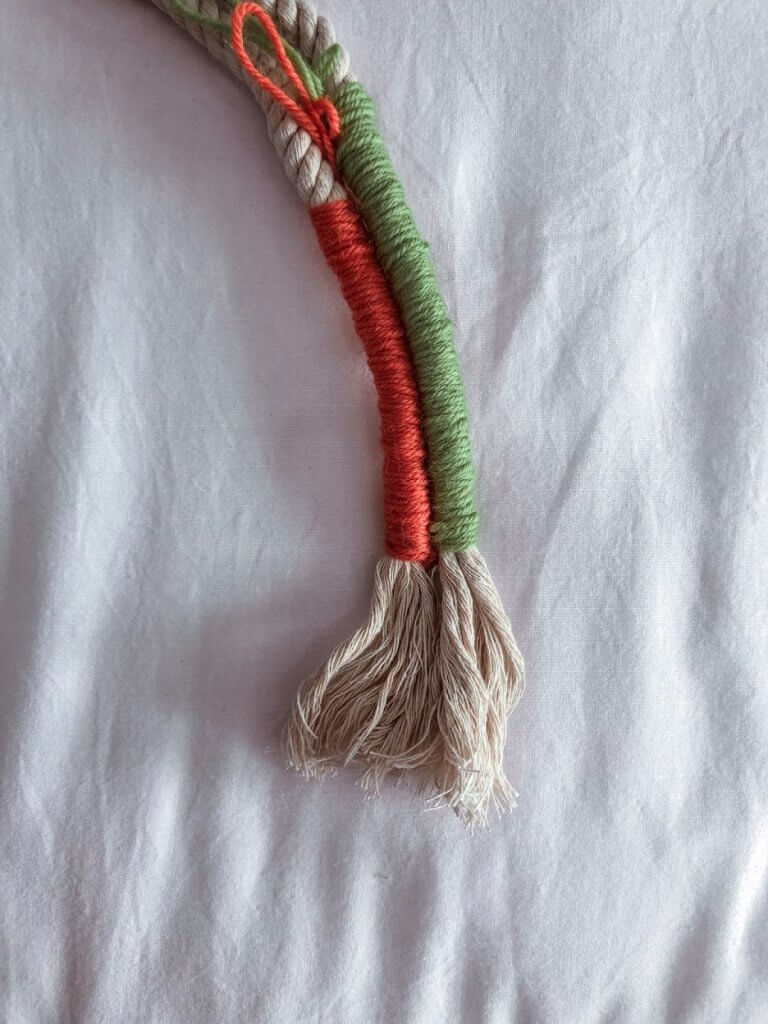
7. Once you have gone through and finished wrapping your wool around each piece of rope you are now ready to stitch the sections of rope together! This is where your curved needle will come in handy. Now if you are like me and don’t care too much about how the back of the rainbow looks then go ahead and stitch the pieces of rope together one by one just using whatever technique you have to get them together. On my original rainbow that I made I used the white wool to do all the stitching at the back. I didn’t care too much as I knew no one was going to see it. If you like things a little more neat and tidy, I would suggest you go and buy a thin cotton that would go more unnoticeable for the stitching. Once you have finished stitching all the pieces of rope together you can now take off the tape from the ends so your rainbow will have its messy textured look! You may need to give your rainbow a bit of a trim to even all the ends out though. You obviously wont need to do this part if you have wrapped your wool around the entire length of your rope
8. Lastly, if you would like to hang your rainbow on your wall you can always buy some ribbon and stitch it to the back. I used some left over wool and fishing line to hang mine from Noah’s playroom window
Happy rainbow making!