

I’m allllllll for the DIY. If it’s something I feel like I can easily make myself, and for the fraction of the price then you can count me in! I have seen so many cute doormats for Halloween online (and for a very steep price to I might add) but had never thought about the possibility of making one myself. By all means the one I made isn’t perfect by any standards but that’s ok as I was purely making it for the outside of Noah’s Kmart cubby and I’m sure in a week or two he will get it dirty or spill something on it anyway! To make this Halloween inspired doormat, the materials came in at under $17 and majority of the things I needed I already had at home. So, if your feeling crafty like me, why not try your hand at doing one yourself. You don’t even have to be limited with Halloween. Create your own slogan and make one for any occasion for your home!
What you will need
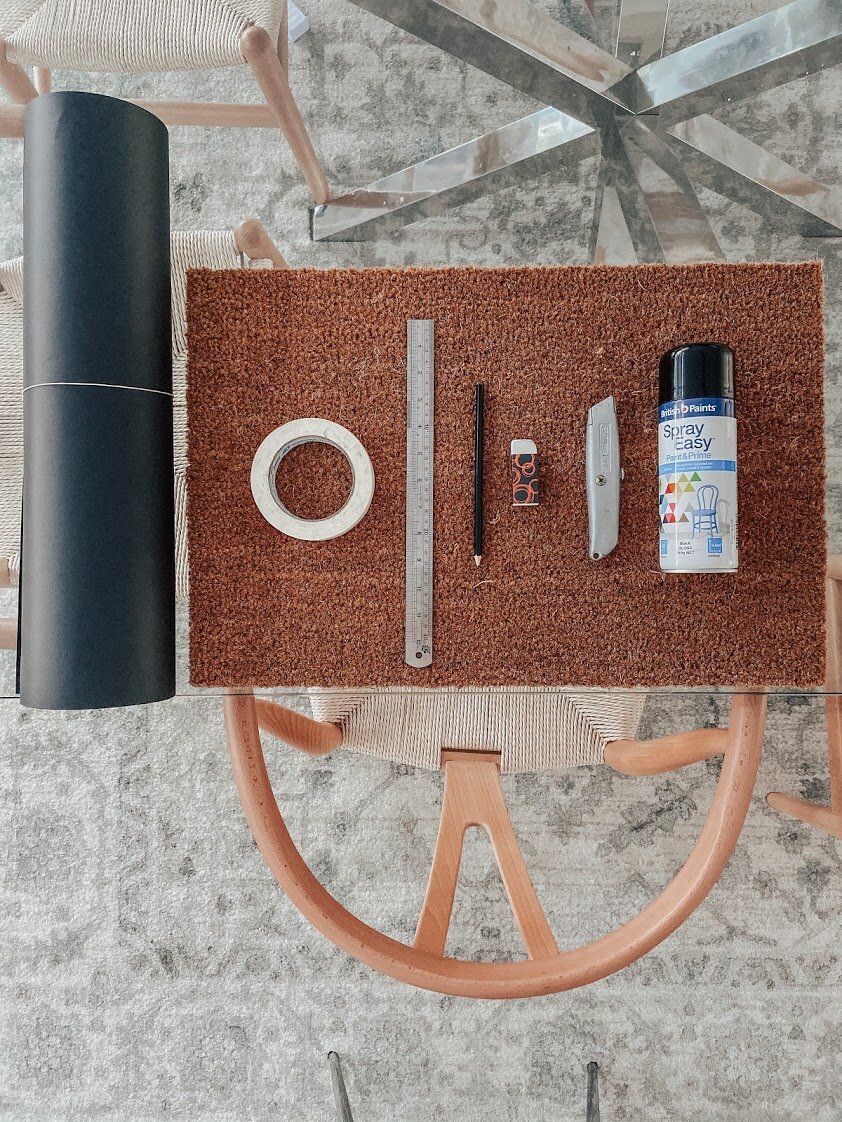
-Plain doormat. I bought mine from Bunnings | SHOP HERE
-Can of black spray paint | SHOP HERE
-Pencil
-Eraser
-Scissors
-Ruler
-Stanley knife
-Chopping board (I used an old chopping board to cut my stencil out from my paper with. Make sure you do this on a hard surface and one that you don’t mind if it gets slightly damaged and that can glide easily enough to cut through with a stanley knife)
-Letter/number stencil (I searched high and low for what I had in mind and in the end couldn’t find what I needed so I drew the saying freehand. If you have a stencil already to work with you can skip through majority of these steps as you wont need to cut yours out by hand)
-Black cardboard 1-2 pieces | SHOP HERE (Note- You can pick up black cardboard from most newsagents, craft stores or chain stores it doesn’t have to be from the store I listed)
-Thick tape (I used left over painters tape which worked fine)
Steps
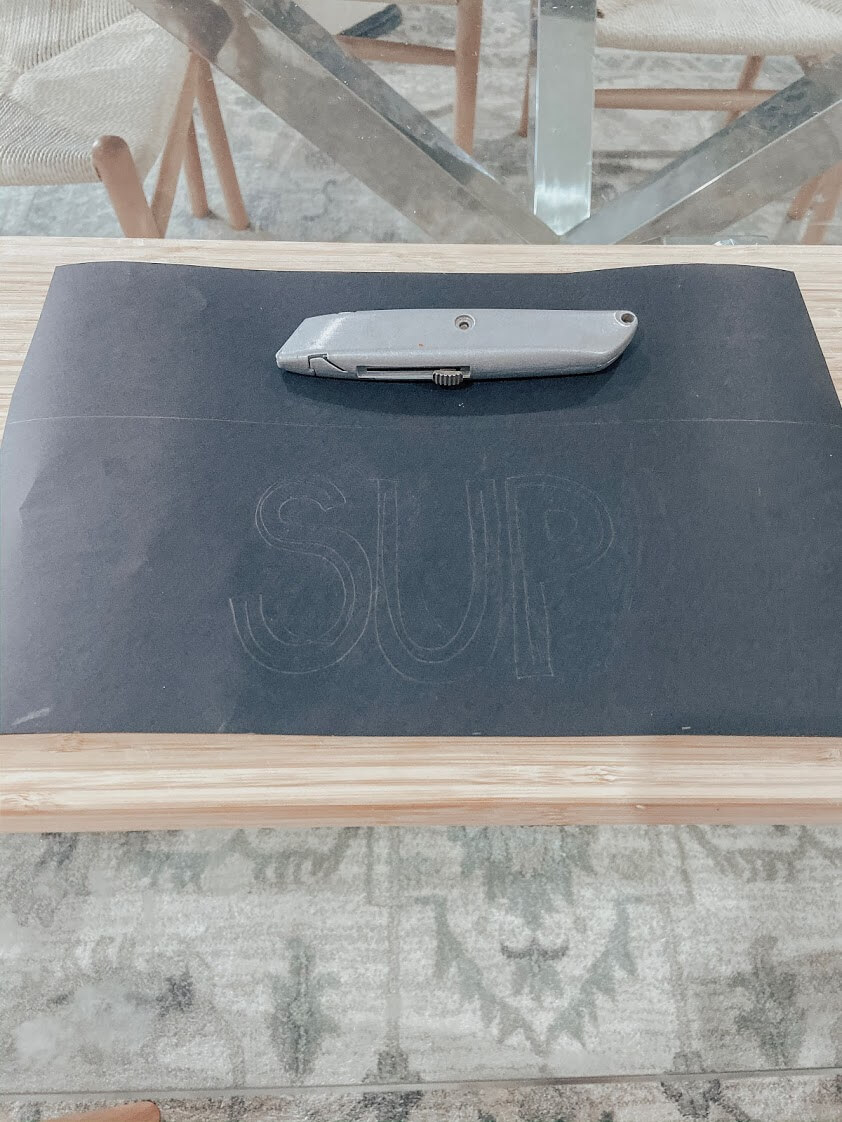
- Lay your cardboard out on a flat surface and start to draw down what you would like to cut out to use as a stencil for on top of your mat. You may need to do a few measurements first to make sure the letters or words you have chosen will be the right size to fit onto your mat.
2. Once you’ve drawn the letters and your happy with how they look you can start to carefully use your stanley knife to cut the letters out. This bit can be a bit tricky so make sure you go slow and take your time so as not to rip the paper

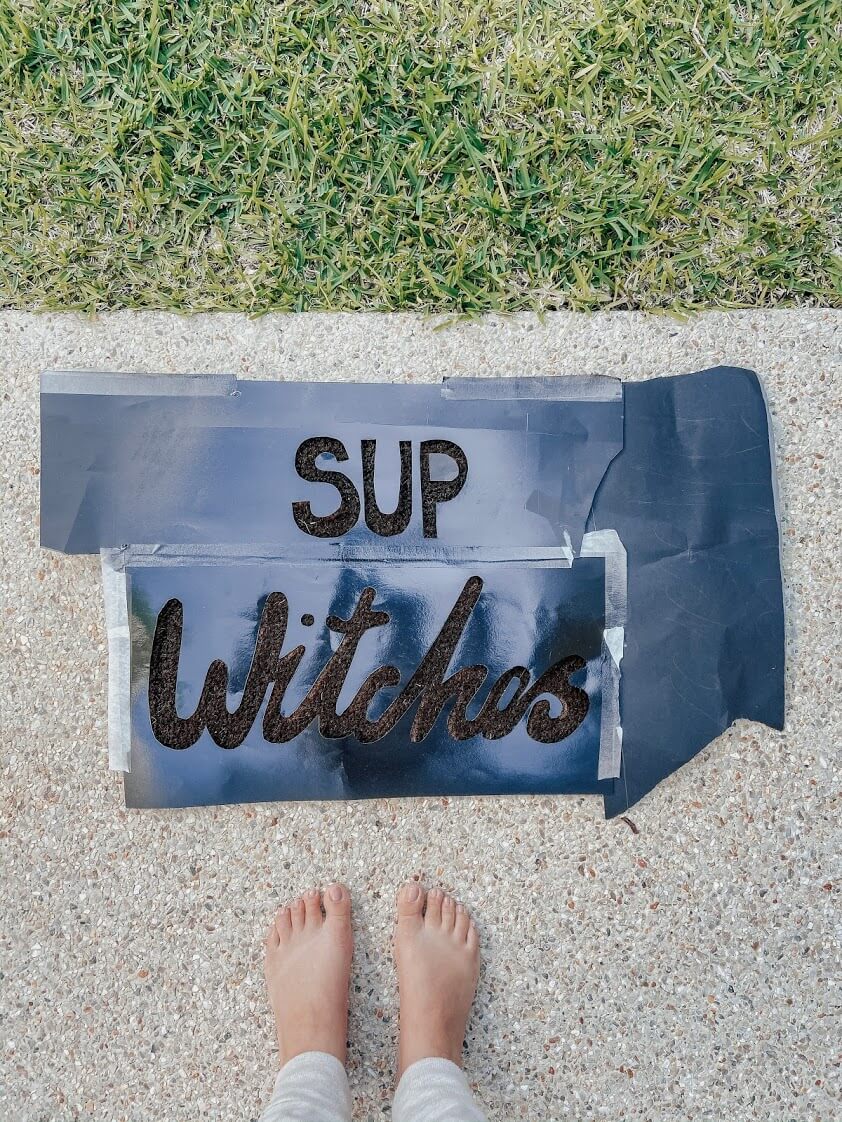
3. You will need to place your cardboard onto your mat next. It’s very important that you stick everything down as much as possible to prevent the spray paint from leaking onto parts of your mat you don’t want it to go to. I would suggest folding your tape over, making it double sided and sticking as many sections of the cardboard down onto the mat as flat as possible. Please make sure as well that there are no parts of your door mat exposed when it is time to spray paint. Use paper or even old cloths to cover the rest of the mat so you only have the wording exposed. Just remember it doesn’t need to look fancy or neat just as long as your whole mat is covered!
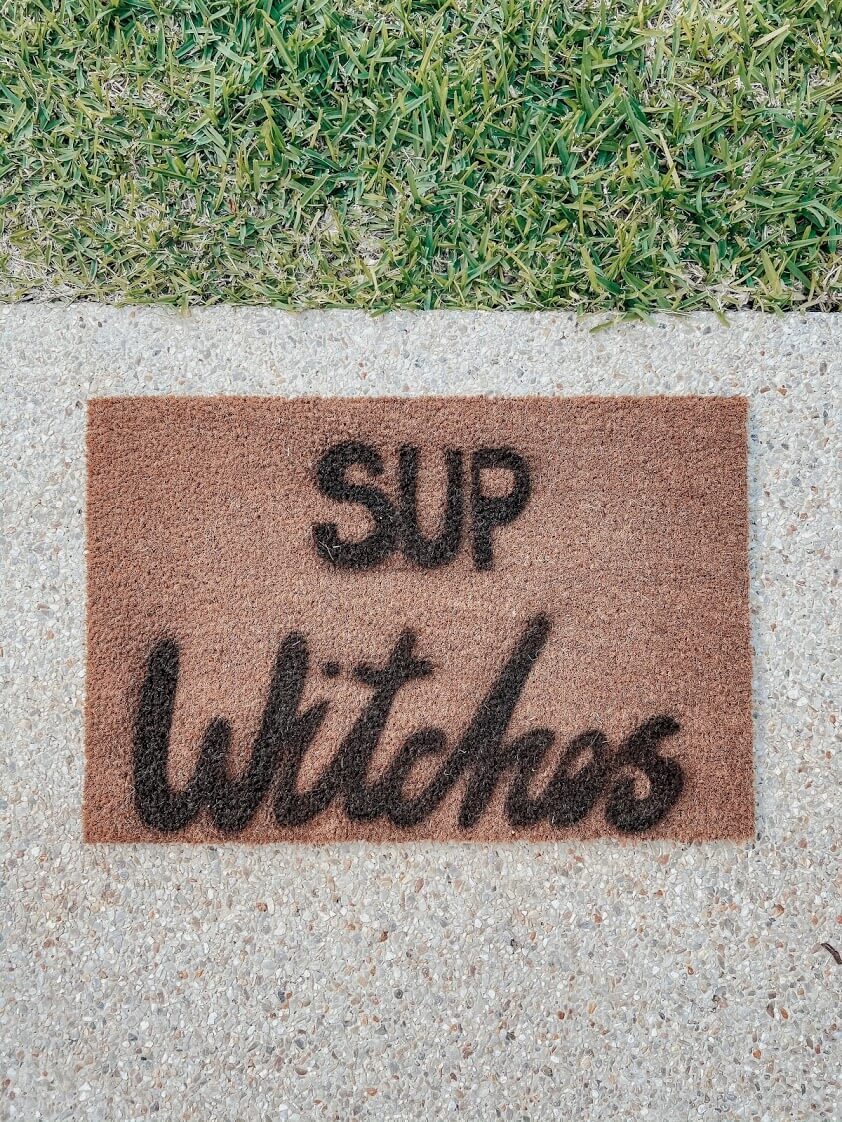
4. I did quite a few coats of paint (all at the one time) onto the mat as I wanted the wording to be nice and dark. When I purchased the spray paint I was told that it was ok to use regular spray paint on an outdoor mat, however the paint will fade a lot quicker than normal so that’s why I was sure to spray quite a few coats

5. I left my mat overnight to dry as well before I took the stencil off. The paint says it will dry in 10 minutes however I didn’t want to take any chances by possibly making the paint bleed if I took the stencil off too early
Finished product
Tips
-Make sure you spray paint in a well ventilated room!
-Hand drawing the words and then cutting it out from the cardboard took the most time. The spray painting took about 5 minutes if that. All up I would say if you have a spare 30 minutes you will be able to get this project done, even less if you have pre bought stencils
-You don’t have to use black cardboard! Even if you have old cardboard at home you can use that! Just remember it cant be too thick that you cant cut your letters out properly
-Items used in featured image-
Glass pillar candle holder SHOP HERE
Olli Ella natural Piki basket SHOP HERE
Woodbase pillar candle holder SHOP HERE
Various pumpkin decor SHOP HERE
-Cassie wears-
Feather and Noise gingham skirt – Currently sold out
Lace up flats – Shop similar HERE

